


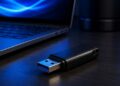
A bootable USB drive has become an indispensable tool for installing or reinstalling operating systems, troubleshooting computers, recovering corrupted systems, and performing advanced maintenance tasks. While numerous third-party applications simplify the process of creating a bootable USB, Windows includes a powerful built-in utility that allows you to accomplish the same task using the Command Prompt (CMD).
Learning how to boot a USB with CMD not only eliminates the need for additional software but also gives you a better understanding of how storage devices, partitions, and boot processes work. Whether you are an IT professional, system administrator, computer technician, or an everyday Windows user looking to install a fresh copy of Windows, creating a bootable USB using CMD is a valuable skill. It provides greater control over the formatting and partitioning process while ensuring compatibility with many Windows installation scenarios.
What does it mean to boot a USB?
Before diving into the technical steps, it is important to understand what “booting a USB” actually means. Many people confuse booting from a USB with simply copying files onto a flash drive, but the two processes are entirely different. Booting from a USB means configuring a USB flash drive so that a computer can load its startup files directly from the drive instead of the internal hard disk or solid-state drive. This allows the USB device to act as the primary startup device during system initialization.
A bootable USB contains special partition information, boot records, and installation or recovery files that enable the computer’s firmware – either BIOS or UEFI – to recognize the drive as a valid startup device. Without these boot components, a USB drive containing installation files will simply function as ordinary removable storage. Bootable USB drives are commonly used for:
- Installing Windows on a new computer.
- Reinstalling Windows after system failure.
- Repairing corrupted operating systems.
- Recovering lost files.
- Running diagnostic utilities.
- Installing Linux distributions.
- Updating firmware.
- Troubleshooting startup problems.
Why use CMD instead of third-party software?
Creating a bootable USB using Command Prompt may seem intimidating initially, especially when graphical tools are readily available. However, there are several compelling reasons why many professionals continue to rely on CMD. Unlike third-party applications, CMD is built directly into Windows. This means you don’t need to download, install, or trust external software, reducing both security risks and compatibility issues. Another major advantage is complete control over the partitioning process.
Instead of relying on automated settings chosen by an application, CMD allows you to manually clean the drive, create partitions, select formatting options, and configure the USB exactly as required. Using CMD also helps users develop a stronger understanding of Windows storage management. Since every command performs a specific task, you gain valuable knowledge about disk structures, partition tables, and boot sectors. Some additional benefits include:
- No additional software installation.
- Faster performance on many systems.
- Greater flexibility.
- Better troubleshooting capabilities.
- Native Windows compatibility.
- Reduced software conflicts.
Although utilities such as Rufus offer additional features like automatic ISO writing and support for advanced partition schemes, CMD remains one of the most reliable methods available.
Prerequisites before creating a bootable USB
Before you begin, ensure you have everything required to complete the process successfully. Preparing ahead of time minimizes interruptions and helps prevent accidental data loss.
1. A USB flash drive
The most important requirement is a USB flash drive with sufficient storage capacity. Modern Windows installation files typically require at least 8 GB of storage, although a 16 GB or larger USB drive is recommended to provide additional room for future use. Keep in mind that every file currently stored on the USB drive will be permanently erased during the process.
2. Windows installation files or ISO image
After preparing the USB drive, you’ll need the operating system installation files. These can come from:
- A Windows ISO file.
- An extracted Windows installation folder.
- Official Windows installation media.
The installation files will later be copied onto the prepared USB drive.
3. Administrator privileges
DiskPart modifies storage devices at the system level. As a result, Command Prompt must be opened with administrative permissions. Without administrator privileges, several commands – including disk cleaning and partition creation – will fail.
4. A Windows computer
Since this guide uses Windows Command Prompt utilities, you’ll need access to a Windows PC. Nearly every modern Windows version supports DiskPart, including:
- Windows 11
- Windows 10
- Windows 8.1
- Windows 8
- Windows 7
Although the interface varies slightly between versions, the commands remain virtually identical.
5. Backup important data
This is perhaps the most important preparation step. The clean command permanently removes all partition information from the selected disk. Always double-check that you’ve selected the correct USB drive before proceeding. Accidentally selecting your primary storage drive could result in complete data loss.
Understanding DiskPart
The heart of creating a bootable USB with CMD is a Windows utility called DiskPart. DiskPart is a command-line disk partitioning utility included in Windows. It allows users to manage disks, partitions, and volumes without relying on the graphical Disk Management interface. Unlike Disk Management, DiskPart offers significantly greater control over storage devices, making it especially useful for advanced system administration and deployment tasks. Some of DiskPart’s capabilities include:
- Viewing available disks.
- Cleaning drives.
- Creating partitions.
- Deleting partitions.
- Formatting storage devices.
- Assigning drive letters.
- Marking partitions active.
- Extending partitions.
- Shrinking partitions.
Because DiskPart operates directly on storage hardware, every command should be executed carefully.
Preparing your USB drive
Proper preparation is essential before copying Windows installation files. Even if the USB drive has previously been used as installation media, starting with a clean partition layout ensures maximum compatibility with different computers.
Step 1: Insert the USB flash drive
Connect your USB flash drive to the computer. Wait a few seconds until Windows detects the device completely. If Windows opens File Explorer automatically, simply close it before continuing.
Step 2: Open Command Prompt as Administrator
The next step is launching an elevated Command Prompt. There are several methods:
- Search for ‘Command Prompt’ in the Start menu.
- Right-click it.
- Select ‘Run as administrator’.
Alternatively:
- Press Windows + X.
- Choose ‘Windows Terminal (Admin)’ or ‘Command Prompt (Admin)’ depending on your Windows version.
Administrator access is mandatory because DiskPart requires elevated permissions.
Step 3: Launch DiskPart
Inside Command Prompt, type:
diskpartThen press Enter. After a moment, the prompt changes to:
DISKPART>This indicates that DiskPart is now active and ready to receive storage management commands.
Step 4: Display all available disks
Next, display every storage device connected to your computer. Type:
list diskDiskPart will produce a table similar to:
Disk ###    Status         Size     Free
--------    -----------    -------  -------
Disk 0      Online         512 GB      0 B
Disk 1      Online          16 GB      0 B
Carefully identify your USB drive by comparing the storage capacity. Never assume the USB is Disk 1. Some computers may have multiple storage devices connected, including external hard drives, memory cards, or additional SSDs. Verifying the correct disk number is one of the most important safety checks in the entire process.
Selecting the correct USB disk
After identifying the USB drive, you must tell DiskPart which disk you intend to manage. This step establishes the target device for every subsequent command. Once selected, DiskPart will apply operations such as cleaning, partitioning, formatting, and assigning a drive letter exclusively to that disk. Because of this, accuracy is critical. If your USB drive appeared as Disk 1 in the previous step, enter:
select disk 1Replace 1 with the number corresponding to your own USB drive. After pressing Enter, DiskPart should display a confirmation message similar to:
Disk 1 is now the selected disk.At this point, pause briefly and verify once again that you have selected the correct device. If you accidentally select your computer’s internal storage drive instead of the USB flash drive, the next command will erase its partition information. In the next part of this guide, you will learn how to clean the selected USB drive, create a primary partition, mark it as active, format it correctly, assign a drive letter, copy the Windows installation files, and prepare the USB so your computer can boot from it successfully.
Cleaning the USB drive
Once you have selected the correct USB drive, the next step is to remove all existing partitions and formatting information. This ensures that the drive starts with a completely clean partition table, reducing the likelihood of compatibility issues during the boot process. The clean command does not securely erase every byte of data on the USB drive. Instead, it removes the partition and volume information, making the drive appear as unallocated space. Since the file system and partition structure are removed, Windows will no longer recognize any previously stored files. To clean the selected USB drive, type the following command:
cleanPress Enter. If successful, DiskPart displays a message similar to:
DiskPart succeeded in cleaning the disk.If you receive an error indicating that the disk is write-protected, verify that the USB drive does not have a physical write-protection switch. If it does not, ensure that no applications are currently using the drive before attempting the command again.
Creating a primary partition
After cleaning the drive, you need to create a new partition that Windows can use for boot files and installation files. A partition is essentially a defined section of storage that can be formatted with a file system and assigned a drive letter. Creating a primary partition is necessary because the USB drive currently contains only unallocated space after the cleaning process. Run the following command:
create partition primaryDiskPart should respond with a confirmation indicating that the primary partition has been created successfully. At this stage, the partition exists but is not yet selected, formatted, or assigned a drive letter.
Selecting the newly created partition
Before making changes to the new partition, you must tell DiskPart which partition to work with. Since only one partition currently exists on the USB drive, selecting Partition 1 is straightforward. Enter:
select partition 1After pressing Enter, you should see a message confirming that Partition 1 is now selected. Every formatting and configuration command that follows will apply to this partition.
Marking the partition as active
For computers that use the legacy BIOS boot mode and the Master Boot Record (MBR) partition style, the partition must be marked as active. This tells the BIOS firmware that the partition contains bootable files. Although this step is generally unnecessary for modern UEFI systems using the GUID Partition Table (GPT), marking the partition as active improves compatibility with older hardware. Type:
activeDiskPart should return a message similar to:
DiskPart marked the current partition as active.If your USB drive is intended exclusively for UEFI systems, the active flag may not be required. However, including it rarely causes problems and helps maximize compatibility across different computers.
Formatting the USB drive
Formatting prepares the partition by creating a file system that Windows and the computer firmware can read. Choosing the appropriate file system depends on the intended boot mode.
Formatting as NTFS
If you are creating a bootable USB for traditional BIOS systems or if your Windows installation contains files larger than 4 GB, NTFS is generally the preferred option. Use the following command:
format fs=ntfs quickThe quick parameter significantly reduces formatting time by creating a new file system without scanning every storage sector.
Formatting as FAT32
If maximum compatibility with UEFI firmware is your priority, FAT32 is often recommended.
Use:
format fs=fat32 quickKeep in mind that FAT32 cannot store individual files larger than 4 GB. Many recent Windows installation images include an install.wim file that exceeds this limit. In such cases, NTFS may be required, or the installation image may need to be split into smaller files. Choosing the correct file system is one of the most important decisions when creating bootable media.
Assigning a drive letter
Once formatting is complete, Windows needs a drive letter so the USB drive can be accessed through File Explorer. Fortunately, DiskPart can assign one automatically. Enter:
assignDiskPart will display a confirmation similar to:
DiskPart successfully assigned the drive letter.Windows may assign any available letter, such as E:, F:, or G:. You can verify the assigned letter by opening File Explorer after exiting DiskPart.
Exiting DiskPart
With the partition created, formatted, and assigned a drive letter, the storage preparation phase is complete. Leave DiskPart by typing:
exitYou will return to the normal Command Prompt window. Although DiskPart is closed, Command Prompt remains open for the remaining steps.
Mounting the Windows ISO
Your USB drive is now properly prepared, but it still lacks the Windows installation files required to boot a computer. If your Windows installation media is stored as an ISO image, Windows 10 and Windows 11 can mount it without additional software. Simply locate the ISO file in File Explorer and double-click it. Windows will create a virtual DVD drive and assign it a drive letter automatically. For example:
- ISO drive: D:
- USB drive: F:
The drive letters on your computer may differ.
Copying Windows installation files
After mounting the ISO, all installation files must be copied to the USB drive. There are multiple ways to accomplish this.
Method 1: Using File Explorer
The simplest method is to open both drives in File Explorer. Select every file inside the mounted ISO and copy them to the USB drive. Depending on your USB speed and the size of the installation files, this process may take several minutes.
Method 2: Using XCOPY
Many administrators prefer using Command Prompt for copying files because it preserves folder structures more reliably. Suppose:
- ISO drive = D:
- USB drive = F:
Run:
xcopy D:\* F:\ /E /F /HThe switches have the following purposes:
- /E copies every folder, including empty directories.
- /F displays the full source and destination paths.
- /H copies hidden and system files.
Allow the copying process to finish completely before removing the USB drive.
Method 3: Using ROBOCOPY
For larger installation images, ROBOCOPY provides greater reliability and error recovery. Example:
robocopy D:\ F:\ /EROBOCOPY automatically retries failed transfers and handles large file sets more efficiently than XCOPY.
Making the USB bootable
For many modern Windows ISO images, copying all installation files to a properly prepared USB drive is sufficient to make the drive bootable. However, older Windows versions sometimes require writing boot code to the USB drive. This is accomplished using BOOTSECT.EXE, which is included with many Windows installation media. If available, navigate to the Boot folder on the mounted ISO and execute:
bootsect /nt60 F:Replace F: with your USB drive letter. This command updates the boot code so that BIOS-based systems can recognize the USB drive during startup. Many current Windows installation ISOs no longer require this step, particularly when targeting UEFI firmware.
Safely ejecting the USB drive
After all files have been copied successfully, avoid unplugging the USB drive immediately. Instead, use Windows’ Safely Remove Hardware feature. This ensures that all cached write operations are completed before the drive is disconnected. Removing the USB while files are still being written can corrupt the installation media, requiring you to repeat the process.
Verifying the contents of the USB drive
Before attempting to boot from the USB, verify that all required installation files were copied correctly. Open the USB drive in File Explorer. A properly prepared Windows installation USB typically contains folders and files similar to the following:
- boot
- efi
- sources
- support
- bootmgr
- setup.exe
The presence of these folders generally indicates that the installation files were copied successfully. However, it is still advisable to test the USB on a computer before relying on it for a critical installation or system recovery task.
Understanding what each DiskPart command accomplished
At this point, it is helpful to review the purpose of each command used throughout the process. Understanding these commands will make troubleshooting much easier and provide a deeper appreciation of how Windows prepares bootable media.
- The list disk command displayed every storage device connected to the computer, allowing you to identify the correct USB drive.
- The select disk command instructed DiskPart to focus all subsequent operations on the chosen storage device.
- The clean command removed the existing partition table, leaving the disk as unallocated space.
- The create partition primary command established a new primary partition capable of storing boot files and installation data.
- The select partition 1 command activated the newly created partition for further configuration.
- The active command marked the partition as bootable for legacy BIOS systems.
- The format command created a usable file system – either NTFS or FAT32 – on the partition.
- The assign command gave the USB drive a drive letter so that Windows and File Explorer could access it normally.
By understanding the role of each command rather than simply memorizing them, you will be better equipped to customize the process for different deployment scenarios and troubleshoot problems when they arise. The USB drive is now fully prepared and contains the necessary Windows installation files. In the final part of this guide, you will learn how to configure your computer to boot from the USB drive, understand the differences between BIOS and UEFI firmware, resolve common boot issues, explore best practices, and find answers to frequently asked questions.
How to boot your computer from the USB drive
Creating a bootable USB is only half the process. The next step is configuring your computer to start from the USB instead of the internal storage drive. This is accomplished by accessing the computer’s firmware settings – either BIOS or UEFI – and selecting the USB drive as the primary boot device. The exact steps vary slightly depending on the computer manufacturer and motherboard model, but the overall process remains largely the same across most systems.
Accessing the boot menu
Many modern computers provide a temporary boot menu that allows you to select a startup device without permanently changing the boot order. Immediately after powering on the computer, repeatedly press the appropriate boot menu key. Common keys include:
- F12
- F11
- F10
- Esc
- F8
Once the boot menu appears, select your USB flash drive and press Enter. If the USB has been created correctly and is compatible with your system’s boot mode, Windows Setup or the recovery environment should begin loading.
Changing the boot order in BIOS or UEFI
If your computer does not provide a temporary boot menu, you will need to enter the BIOS or UEFI setup utility. Restart the computer and press the appropriate setup key, commonly:
- Delete
- F2
- Esc
- F10
After entering the firmware interface, locate the Boot section. Move the USB drive to the top of the boot priority list, save the changes, and restart the computer. If the USB drive is connected properly and the boot files are intact, the system should boot directly from the flash drive.
BIOS vs. UEFI boot modes
Understanding the distinction between BIOS and UEFI is essential because it affects how a bootable USB should be prepared and how the computer recognizes it. The Basic Input/Output System (BIOS) is the traditional firmware found on older computers. It typically uses the Master Boot Record (MBR) partitioning scheme and often requires the boot partition to be marked as active.
The Unified Extensible Firmware Interface (UEFI) is the modern replacement for BIOS. It offers faster startup times, improved security features such as Secure Boot, support for larger storage devices, and compatibility with the GUID Partition Table (GPT). When creating a bootable USB with CMD, the file system you choose plays an important role:
- FAT32 is generally preferred for UEFI systems because it is natively supported by UEFI firmware.
- NTFS is often more suitable for BIOS systems or Windows installation images containing files larger than 4 GB.
Some modern motherboards support both BIOS (Legacy Mode) and UEFI, allowing users to choose either boot method depending on their requirements.
Common CMD commands explained
Throughout this guide, you have used several Command Prompt and DiskPart commands. Understanding what each one does can make future maintenance tasks much easier.
- The diskpart command launches Microsoft’s advanced disk management utility.
- The list disk command displays every storage device connected to the computer, allowing you to identify the correct USB drive before making changes.
- The select disk command specifies which storage device DiskPart should manage.
- The clean command removes all partition information from the selected disk, effectively resetting it to an unallocated state.
- The create partition primary command creates a new primary partition capable of storing boot files.
- The select partition command chooses the partition that subsequent commands will modify.
- The active command marks the partition as bootable for systems using legacy BIOS firmware.
- The format command prepares the partition with a usable file system such as FAT32 or NTFS.
- The assign command allocates a drive letter so that Windows can access the partition through File Explorer.
- The exit command closes DiskPart and returns you to the standard Command Prompt environment.
Understanding these commands enables you to perform a variety of storage management tasks beyond creating bootable USB drives.
Troubleshooting common issues
Even when every step is followed carefully, problems can still occur. Most issues stem from incorrect partitioning, incompatible firmware settings, corrupted installation files, or hardware limitations. Fortunately, many of these problems can be resolved with a systematic troubleshooting approach.
USB drive does not appear in the boot menu
If the USB drive is missing from the list of available boot devices, first confirm that it is fully inserted into a functioning USB port. Trying another USB port – preferably a USB 2.0 port on older systems – can often resolve detection issues. Next, verify that the bootable USB was created successfully and that the installation files were copied completely. If the problem persists, review your BIOS or UEFI settings to ensure that USB booting is enabled.
“No bootable device found”
This error typically indicates that the firmware cannot locate valid boot files on the USB drive. Possible causes include:
- The installation files were not copied correctly.
- The USB partition was not prepared properly.
- The wrong boot mode (BIOS or UEFI) is being used.
- The ISO image is incomplete or corrupted.
Recreating the USB from scratch usually resolves the issue.
DiskPart reports “Access is denied”
This error generally occurs when Command Prompt is not running with administrative privileges. Close Command Prompt and reopen it using Run as administrator before executing DiskPart commands again.
“The media is write protected”
Some USB drives include a physical write-protection switch. If yours has one, move it to the unlocked position. If no switch exists, the drive may have entered a read-only state due to hardware failure or corruption. Testing the USB drive on another computer can help determine whether replacement is necessary.
Windows installation files exceed FAT32 limits
One common issue with newer Windows installation media is that the install.wim file exceeds FAT32’s maximum single-file size of 4 GB. Possible solutions include:
- Formatting the USB as NTFS.
- Splitting the WIM file into smaller SWM files using Microsoft’s DISM utility.
- Using installation media specifically designed for FAT32 compatibility.
Choosing the appropriate solution depends on your target hardware and firmware configuration.
Advantages of using CMD
Although graphical utilities are popular, creating a bootable USB with CMD offers several meaningful benefits. One of the greatest advantages is that no additional software is required. Everything needed to prepare the USB drive is already included with Windows. CMD also provides greater transparency. Instead of clicking buttons in a graphical interface, you execute each step manually, giving you complete visibility into the partitioning and formatting process.
For IT professionals, system administrators, and technicians who regularly deploy Windows across multiple machines, CMD offers a consistent and dependable workflow that can be incorporated into automation scripts and deployment procedures. Additionally, understanding DiskPart improves your ability to diagnose storage issues, recover damaged partitions, and manage disks more effectively in other scenarios.
Limitations of using CMD
While CMD is powerful, it is not always the most convenient option. Unlike dedicated bootable USB applications, CMD requires precise command entry. Even a small typing mistake or selecting the wrong disk can result in data loss. CMD also lacks built-in features found in many third-party tools, such as automatic ISO detection, checksum verification, persistent Linux storage creation, and support for multiple operating systems on a single USB drive.
Furthermore, users unfamiliar with command-line interfaces may find the process intimidating, particularly when managing partitions and file systems manually. For users who frequently create bootable media for different operating systems, specialized utilities may offer a faster and more user-friendly experience.
Best practices when creating a bootable USB with CMD
Following proven best practices can help ensure reliable results and reduce the risk of errors. Always verify the correct disk number before running the clean command. This single precaution can prevent accidental data loss on your primary storage drive. Use high-quality USB flash drives from reputable manufacturers. Low-quality drives may experience slower transfer speeds, premature failure, or inconsistent boot performance. Download Windows ISO images only from official Microsoft sources to reduce the risk of corruption or malware.
Safely eject the USB drive after copying files to ensure that all write operations have completed successfully. Whenever possible, test the completed bootable USB on a spare computer or within a virtual machine before relying on it for critical installations or disaster recovery. Keeping a backup copy of important installation media can also save valuable time if your primary USB drive becomes damaged or misplaced.
Frequently asked questions
Many users encounter similar questions when learning how to create bootable USB drives using CMD. The following answers address some of the most common concerns.
Can I create a bootable USB without third-party software?
Yes. Windows includes DiskPart and Command Prompt, both of which provide all the tools necessary to prepare a bootable USB drive without installing additional applications.
Does CMD work with Windows 11?
Yes. The same DiskPart commands work on Windows 11, Windows 10, Windows 8.1, Windows 8, and Windows 7, although the interface used to launch Command Prompt or Windows Terminal may differ slightly.
Can I use CMD to create a Linux bootable USB?
DiskPart can prepare the USB drive, but many Linux distributions require specialized methods for writing ISO images. Tools designed specifically for Linux installation media are often better suited for that purpose.
Is FAT32 always better than NTFS?
Not necessarily. FAT32 provides broad UEFI compatibility but cannot store individual files larger than 4 GB. NTFS supports larger files but may not boot on every UEFI-only system without additional support. The ideal choice depends on your firmware and installation media.
Will the USB be erased during the process?
Yes. The clean command removes all existing partition information, and formatting creates a new file system. Always back up important files before beginning.
Can I reuse the USB drive later?
Absolutely. After completing your installation, you can format the USB drive normally through File Explorer or Disk Management and use it again for general file storage.
Conclusion
Learning how to boot a USB with CMD is a valuable skill that provides greater control over the process of creating bootable installation media. While graphical tools simplify many tasks, Command Prompt and DiskPart remain among the most reliable and versatile utilities available in Windows. By understanding how each DiskPart command works, you gain insight into partition management, file systems, and the Windows boot process itself.
Rather than relying on automation, you can confidently prepare USB drives for operating system installation, system recovery, troubleshooting, and advanced maintenance. Although the process requires careful attention – particularly when selecting and cleaning disks – it becomes straightforward with practice. Following the steps outlined in this guide ensures that your USB drive is properly partitioned, formatted, populated with the necessary installation files, and ready to boot on compatible systems.
Whether you are installing Windows on a brand-new computer, repairing an existing system, or expanding your technical knowledge, mastering bootable USB creation with CMD is an investment that will continue to pay dividends. With the right preparation, an understanding of BIOS and UEFI, and a reliable USB flash drive, you can confidently create bootable media whenever the need arises, without depending on third-party software.


